02 and older overlay/led instructions
02 and older car and truck overlay instructions: Avoid touching the face with your bare hands as oil and dirt can leave smudges. Cotton style gloves are recommended to avoid fingerprints.
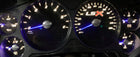
(1) Take picture with key on vehicle not running preferably cold with even level of fuel.
(2) remove cluster
(3) remove lens, needles and plastic alignment pins and stops
(4) peel off factory overlay
(5) make sure there is no factory face residue on the plastic underlayment around where the logos and/or numbers are as it can cause distortion with the lights
(6) carefully remove face from plastic, highly recommended cotton or latex gloves to avoid fingerprints, install overlay and 1 alignment pin on the top side of tachometer and speedometer only. You can apply a little super glue to the corners to hold it in place. Set the lens back on until glue dries to avoid the face from getting moved
(7) remove the lens and reinstall cluster
(8) turn key back on
(9) using the picture from step 1, install the needles back to the original position
(10) install the bottom alignment/stop pins and lens
(11) verify gauges are accurate
(12) the turn signals may be a little dimmer than factory. Use a green 194 led found at nearly any store.
P.S. if you purchased LEDs the aftermarket sockets have to be tighten to full lock then backed out about 1/8" due to contact pads being slightly different than originals. They are polarity sensitive so if they don't work flip them over 180 degrees
(1) turn your key on and take a picture of each gauge showing what position they are at. It is better to do this with an even about of fuel along with a cold engine to avoid misalignment.
(2) remove your cluster, lens, needles and the face. Sometimes the faces will leave a glue residue which is fine just remove any extra remains of the original face
(3) Carefully remove the face and lay it over your cluster. Latex or cotton gloves are highly recommended as the faces are ink printed so fingerprints will noticeable. You can add a touch of glue to the corners not in a visible area if needed to keep it from moving around.